|
This page was exported from The Vespa Guide
[ http://vespaguide.com ] Export date: Thu Apr 3 12:22:56 2025 / +0000 GMT |
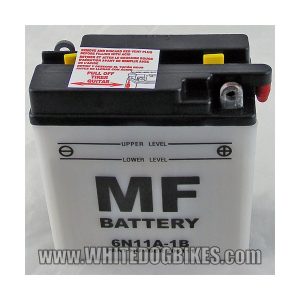
How to Maintain Your batteryTo maintain the Vespa Scooter battery life then it is important to keep it in good condition. The following How To Guide will help you get the best out of a battery. What you will need ;-
Step 1 Put on your rubber gloves and goggles. Step 2 Removing the battery from the scooter begins by spraying the battery with Battery Cleaner. Using your screwdriver, disconnect the negative (-) wire on the battery first. Remove the positive wire (+) and remove the battery strap or belt. Pull the battery out SLOWLY, so the overflow tube does not catch. Step 3 Take the disconnected battery to a clean space and place the battery on some newspaper. If the terminals are corroded, take a wire brush and brush them clean, wipe filings and dirt away with a dry cloth. Spray battery cleaner onto a lint free cloth and wipe the terminals. Step 4 If it is dirty, remove the overflow tube and clean it by spraying battery cleaner through the hose. Run the tube under hot running water until it's clean. Used compressed air or equivalent to blow out the water and re-attach. Step 5 On the front of the battery, see the fill level in each cell; they should all be just below the "High" fill line. If they appear lower than this level on a flat surface, you should fill them up. To fill the cells, pull off the filler cap for that cell with a pair of needlenose pliers. Most filler caps pull straight out; however, some are threaded, so twist them in the direction marked first. Fill to the level specified with distilled water. Minerals in tap water can slowly ruin a battery. Replace the filler caps. Step 6 If your battery was severely discharged for some reason (signals not working, horn quiet or tail light not coming on when the key is turned), charge it up with a motorcycle battery charger (never more than a 2 amp charger). Make sure you have the charger set on the correct voltage for your battery (6 volt or 12 volt). Also check the fuse in the your bike while the battery is out. The fuse is usually held in a clip-on holder on the left-hand side of the battery platform. If the fuse is blown, replace it before installing the battery. Check for any rust or corrosion inside or outside the fuseholder. If it is corroded replace the fuseholder without delay. Step 7 Re-install the battery in the reverse order or removal making sure that the overflow tube goes back in the correct position. If the rubber strap is broken, replace it. If the wires to the battery are corroded, clean them with that wire brush and carb cleaner. If you need to replace a battery connector, get a similar one from you local scooter shop. Warning !!DO NOT let your scooter attempt to recharge your dead battery! When batteries start to charge they draw a huge amount of current, this is not good for the electrical system in your scooter. Furthermore, never run a battery model scooter without the battery. You will damage the stator plate and electrical system. |
|
Post date: 2008-10-27 05:22:30 Post date GMT: 2008-10-27 05:22:30 Post modified date: 2016-06-20 04:19:45 Post modified date GMT: 2016-06-20 04:19:45 |
| Powered by [ Universal Post Manager ] plugin. HTML saving format developed by gVectors Team www.gVectors.com |
