|
The Vespa Guide http://vespaguide.com/?p=559 Export date: Thu Jan 2 20:06:24 2025 / +0000 GMT |
1967 Vespa 150 Super Restoration Project (Part 2 of 5)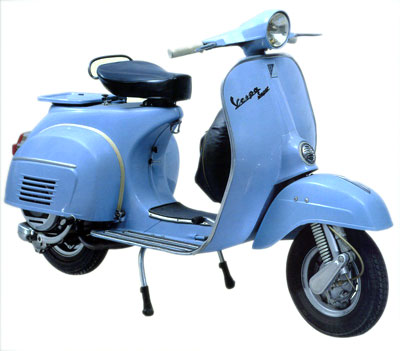 This is part 2 of the Vespa Super Restoration Project. In this article the writer deals with the paint colour.The Original Colour I had always disliked the 'baby blue' colour of my Vespa. As I brought it second hand, I didn't have much of a choice. But I believe the choice in those days for the eight inch wheel models was restricted to blue for the 150cc Super, and white for the 125cc. I found the original colour of my Vespa VBC 150 listed here: 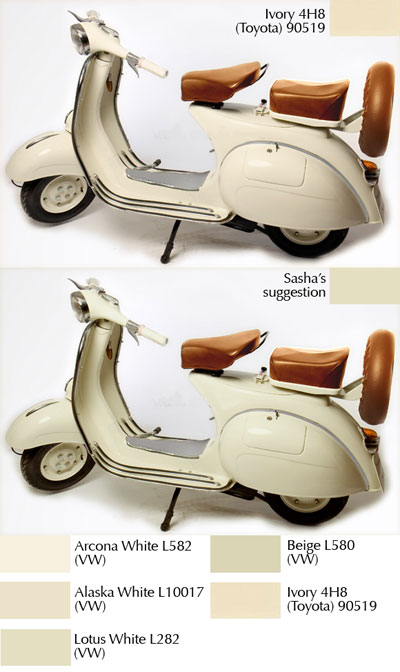 http://scoot.net/faq/Paint_codes Body panels - 'Baby Blue': Max Meyer Code 1.298.7213 Fork, hubs, flywheel cowl, etc. - 'Aluminium': Max Meyer Code 1.268.0983 My original VB1T 150 colour was probably: 'Metallic Blue/Grey': Max Meyer Code 15028 I also found a picture on the internet of my model restored to its original colour scheme (left) which gave me an idea of what it would look like if I followed the path of an authentic restoration. Nope, I still don't like the colour. Probably in the late 60s or early 70s, an in-your-face flame orange would have been my choice. The angular styling of the body panels that was introduced by the 180 Super Sport in 1964 was a dramatic departure from the curvaceous lines of earlier Vespas. The make-over which soon flowed across all models was aimed at refreshing the appearance of the Vespa so as to appeal to a younger generation. Along with this styling change came some bold bright colours. The Vespa flagship that the 180SS replaced was the 160GS - the collectors' prize model. The 160GS had a , understated but sophisticated colour scheme. 'Gray-White': Max Meyer Code 1.298.8714. With a grey saddle seat and polished aluminium trim, this was a truly beautiful scooter. Now with the chance to re think the colour scheme, I wanted something more 'vintage' in appearance. I actually want to age the scooter by about 10 years. From the outset I was headed towards an antique off-white colour, perhaps ivory but not cream. 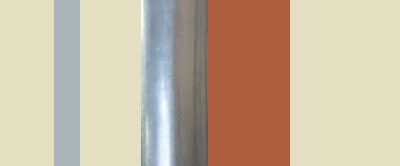 Again I turned to the Internet and gathered together a collection of images with colours schemes to my liking. The supposedly 'restored' scooters coming out of Asia (mostly made from a Frankenstein collection of body parts from various models) were invariably two-toned. They look great and were evocative of a particular era. However, although cars with two tone panels were popular during the 1950s-60s, Piaggio never went down this path with the Vespa. Again I turned to the Internet and gathered together a collection of images with colours schemes to my liking. The supposedly 'restored' scooters coming out of Asia (mostly made from a Frankenstein collection of body parts from various models) were invariably two-toned. They look great and were evocative of a particular era. However, although cars with two tone panels were popular during the 1950s-60s, Piaggio never went down this path with the Vespa.27 January 2010 I discover that ScooterWorks has grey rubber trim for all the visable rubber parts of a Vespa. A grey colour will look so much better that black rubber trim when seen against of very light coloured body. Black provides too much contrast. My colour choice almost flowed backwards from the colour of the replacement seat covers I saw on the Internet available from ScootRS in Vietnam. I particularly liked this this one. 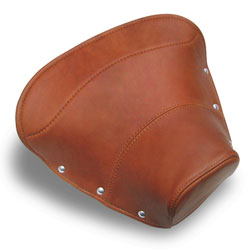 Then I discovered that they also had a pillion seat in tan as wheel as a wheel cover. At this stage I was still toying with the idea of spray painting it myself using large tinted spray cans. I went to an autoshop and browsed through their auto paint colour charts and noted a few colours that I liked. I then found some of these charts had been digitised and were available on the internet. After reading and talking to some experts, I decided that to get a good paint job was technically tricky. My paintwork was starting to craze and did not provide a good bonding surface. It would have to be taken back to bare metal. On the 12 January 2010, I decided to get the bodywork professionally painted. This stage sounds simple: choose a paint and a colour. The reality is there are a dizzying array of products, options and opinions available and it was an interesting exercise wading through them all. The choice quickly narrows to two paint systems: A single stage acrylic or a base/clear coat system. I'm certainly no paint scientist, however two things bothered me about the base/clear coat option: 1. The final surface can look too "wet" and over restored. Some people specifically like this look, however I feel that it is a little unsuited for a 1960s bike. A new 160 GS certainly gleamed out of the factory but not with the over glossy look that many restorations suffer from. The acrylic finish, by comparison provides a shiny "deep look" that looks hard, brilliant and reflective. 2. Clearcoat is is less tolerant of touch-up and spot repairs later compared to an enamel paint finish. Although base colour/clearcoat offers better UV protection and is (debatably) easier to apply I felt that an acrylic enamel would look and age more like the original factory finish. Somehow the colour makes it look very, very Italian. I've subsequently found that this colour is also currently being used on Minis which is being called 'Pepper White'. Resources: VW Lotos Weiss - Lotosweiß - (Lotus White) L282 (CLR909) http://www.type2.com/m-codes/t2colors.html Volkswagen Colour Chart http://www.thesamba.com/vw/archives/info/colorstype2.php Max Myer to PPG Paint Conversion Table http://vespaguide.com/cms/?p=342 Best source of information: http://vespapaintcodes.com/faqs.php 1966 - onwards: Max Meyer Paint Code: “Light Blue” 1.298.7400 L 62 (46) ivory L 282 (42) lotus white http://www.pre67vw.com/colours/default.aspx?cg=7 Original Source: This article originaly published at http://members.iinet.net.au/~david_imam/colour_scheme.html   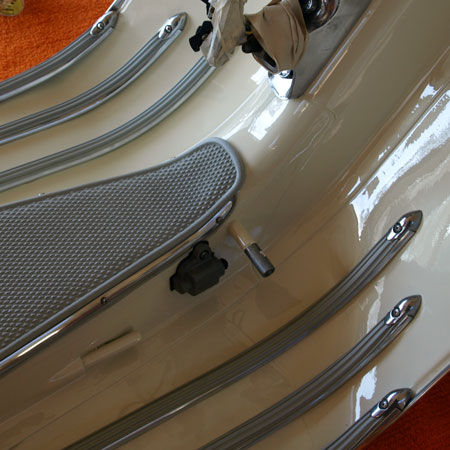 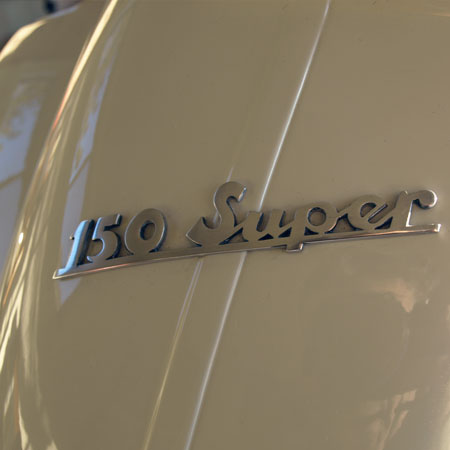 |
|
Post date: 2014-10-02 04:29:43 Post date GMT: 2014-10-02 04:29:43 Post modified date: 2014-10-02 08:59:35 Post modified date GMT: 2014-10-02 08:59:35 |
|
Export date: Thu Jan 2 20:06:24 2025 / +0000 GMT This page was exported from The Vespa Guide [ http://vespaguide.com ] Export of Post and Page has been powered by [ Universal Post Manager ] plugin from www.ProfProjects.com |