|
This page was exported from The Vespa Guide
[ http://vespaguide.com ] Export date: Wed Apr 2 6:51:00 2025 / +0000 GMT |
1967 Vespa 150 Super Restoration Project (Part 3 of 5)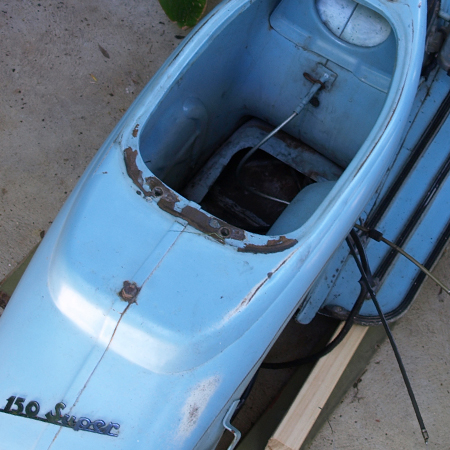 Project Vespa 150 Super Restoration Diary Part 1?? November 2009 I went to my nephew's house where my Vespa had been stored for a number of years. I need to bring it back home so that I can begin work on it. I remember the day well as a tradesman who was installing an air conditioning unit at the house backed straight out of the driveway and into the door of my car parked across the road. Oh well. Anyway, I wanted to see if I could start my Vespa. I poured in the petrol I had brought along as the tank was bone dry and added some twenty year old two-stroke oil. I checked the spark. It was nice, bright and fat. I tried several times to kick start it but no luck. Happily the house was on a hill and it spluttered into life just as I was about to get to the bottom. I see by the registration sticker that the last time it was registered was in 1991. I won't tell you how I got it home as I would be incriminating myself. Once home, a trip around the block to test it on a familiar hill. Its performance was rather asthmatic and it stalled a number of times. Wednesday-Thursday 2-3 December 2009 Began research on Internet. This wasn't the first time I had looked at things Vespa. About two years ago at work, I poked around and read up on some Piaggio history and the story of the Wasp. Perhaps unconsciously that was the catalyst for this project, but I don't recall wanting to get the old girl working again, and yet I had kept her all these years. This search was to try and find a place to get spare parts in Melbourne. Along the way I discover a year make chart and so can find the build year of my Vespa. 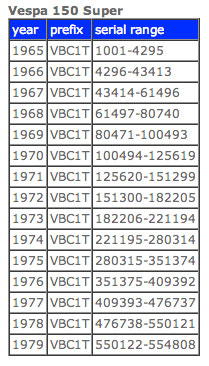 http://www.scooterdave.com/?page_id=177 The model and serial number of my 150 Super is VBC1T 59162. That means it was built in 1967. Looks like there were 18,082 of this particular model made during that year. That's extraordinary! At an average of 1,507 per month, mine may have been built in October 1967 - about the same time as they changed the style of the Piaggio badge from the 'P' shield design to the octagon. I have the old design, but more about this later. As the bottom of the range of Vespa 150cc scooters, the VBC became a very common model produced for 15 years. If Piaggio serial numbers are sequential for each model, then it seems a total of 553,807 VBCs were made. Perhaps that's why collectors are not so interested in them. I've also been told that the VBC 150s have a very ordinary motor. Mine's a two transfer port model rather than a piston ported one, and it has the rotary disc valve built into the crankshaft assembly. Three port and then five port engines were developed later. Early in my Internet search, I bump into the web pages of a guy in Portland who has restored a few Vespas. On his site I first read about the shoddy Vespa restorations in Asian: http://scootissimo.com.au Oh dear, one of my best friends has brought 3 of these in Vietnam. Then via this web site, I find "The Vespa Wizard": http://www.thevespawizard.com.au Friday 4 December 2009 Bought grey rubber bead for the glovebox and engine cowls, the rubber hose that connects the carburetor airbox to the frame, rubber feet for the centre stand, and two foot strip end caps from GPS Imports in Hoddle Street, Collingwood. Stopped by Vespa House in Johnston Street where I used to get my VB1 and VBC serviced. I remember my brother taking me there to get spares in the early 1960s when there were still horse troughs and deep bluestone gutters in Johnson Street. However they were not interested in having a look at my motor. Instead they gave me a card for Derek in Collingwood who fixes up scooters. We went to his workshop to discover that he also welds up wrought iron artwork. A very nice guy with an interesting collection of scooters including the holy grail of Vespas, an old Grand Sport 160 which he said was worth about $10k. He was garaging this for a friend. His personal scooter is a Lambretta and he prefers not to 'do it up', but rather to let its character build with age. We talked about what it might entail to look over my Vespa, and about oil seals drying out if the machine stands unused for too long. Is 19 years too long? He said just bring it in and he might be able to get it done by Christmas. I asked if it would be best to pull out the motor first. He said the Vespa frame is the best test bed. Although Derek was a very nice bloke, I knew I could save a lot of money by taking the thing apart myself. I think that evening, I decided to ring "The Vespa Wizard". Saturday 12 December 2009 Well, here we go! Today is the day I decide to take the girl apart, but before hand, I take a few pictures of her while still in one piece as she's reasonably clean. I suspect I won't be seeing her like this again for a number of months. I not only have to remove the motor to be checked out, but need to take off all the panels and prepare the bodywork for eventual painting. As I do so, I document the worst of the damage to various parts of the bodywork to give the repairers / painters, an honest idea of what the work will entail. Poor girl. She gets up-ended in a very undignified way as I can look up her skirt. As I took it apart, I was amazed at how I remembered just about every part, nut and bolt of the machine. It was all so familiar to me. I also remembered the differences between my VB1 and VBC. I take a picture of the wiring box as is comes out of the stator so I can connect everything together again. Digital cameras are great for this as a picture says it all. The Vespa motor is a very compact unit since its part of the suspension system and directly drives the back wheel without the need for a lengthy transmission chain. It's more like a motorised wheel. A four speed wheel barrow anyone? How on earth does this little thing push me along at 90km an hour fully loaded with camping gear? I find that just about every piece of rubber has perished, cracked and even fried. Below, all that's left of the HT lead grommet and the rubber beading between the cowls and central frame. The air bellows have split too. Sunday 13 December 2009 Spend time washing, de-rusting and cleaning up the engine and glovebox cowling. The rear mudguard and motor housing is going to need a lot of cleaning too. I could probably leave this to be all sand blasted away, but I am still contemplating spray painting it myself. We'll see.... Monday 14 December 2009 Spent this day cleaning up the engine so that it was more pleasant for Roberto to work on and so that no dirt would fall inside the crankcase once he splits it. Working underneath my carport, I use heating oil from a disused oil heater tank to clean the engine with a toothbrush and rag. Roberto mentions that there is the option of having the crankcase aqua blasted which removes oxidation and scaling and brings it up better than new, but said it costs about $200 and will take about one month. I have seen the result of this kind of cleaning and it does look wonderful. However this is a scooter intended for daily use rather than to showcase, so the engine will get dirty again all too quickly. I'm reasonably happy with how clean I've got it, and if the motor can be made more oil tight than its been in the past, then it should stay this way for a while. Tuesday 15 December 2009 In order to save money, I disassemble several engine parts, pulling off the kick start lever, rear brake drum, ignition coil, carburetor, wiring junction box and the flywheel and stator plate. Unlike my old VB1, the VBC has an inbuilt flywheel puller courtesy of the securing nut acting against a cir clip. It breaks away from the tapered shaft quite easily. As it does so, I am reminded of the purpose of woodruff keys. The flywheel is rather corroded and I spend a bit of time with a wire brush trying to de-scale it. Another discovery - no wonder my rear brake was so poor. The brake shoes are covered in oil. The crankcase/wheel shaft seal has worn out. I bring the reasonably clean engine inside and put it on the dining room table. Lucky I have an understanding partner. I remove the cylinder head and slide off the cylinder and de-coke these. I clean the cooling fins on the cylinder barrel with a wire brush as there is all kinds of gunk between them. I also apply rust converter. I haven't seen the inside of my scooter for over 20 years. I plug all the exposed holes, such as the carburetor and exhaust ports with clean rags to keep the dirt out. Wednesday 16 December 2009 Today's task was to photograph the various body parts so that I could send off pics to get some quotes for sandblasting and painting. I also photograph the damage to various places underneath the floorpan. I ring Joseph, the body restorer recommended by Roberto. I had an interesting talk with him about Vespas except that our conversation makes me rather depressed about the project. In a sense he challenges me to think about the reasons why I should spend so much money and go to so much trouble to get an old scooter working again. He says it will probably cost around $3,500 for him to fix up and repaint my bodywork and for that kind of money I could get a nice new scooter which would go and handle much better. These old scooters are only good for putting around town and for latte runs. I tried to refute his view in that mine had given me much pleasure. I used it on camping trips all over Victoria as well as to Sydney and back, and at one time, seemed to be one of the fastest things on the road. I explain that my VBC is not a Vietnamese frankenstein and that I am the original owner since new and that there won't be any nasty surprises under body filler since there isn't any. The price was far more than I wanted to pay so I asked him about spraying directly over the original paintwork. He gets a bit upset by this suggestion in that he doesn't want his beautiful paint to pull away and break down because of old unstable paint underneath. Actually I'm sure he is right as my paintwork has crazed in a few spots (see photo) and will probably continue to disintegrate over time. He explained his processes, which I find educational. He said that the diecast aluminium headlight assembly needs to be soda blasted as sandblasting pits this soft metal. Obviously he is fastidious and takes pride in his work and I am learning a bit more about the steps involved. I suggest that I send him some pictures so he can get a better idea of its condition. Joseph rings me a couple of weeks later saying that, yes, it won't be as expensive as he originally indicated and that he would get back to me with a rough estimate. So far, he hasn't. I carefully pack up all the various parts, wrapping the cylinder head, cylinder and carburetor in clean cloth in readiness to take to 'The Vespa Wizard' tomorrow. More Internet searches for body painters and I discover a panting method called "powder coating".   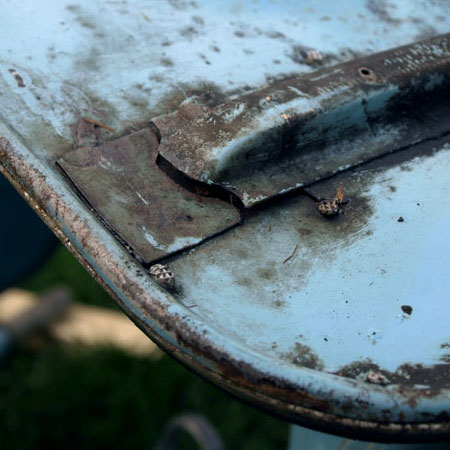 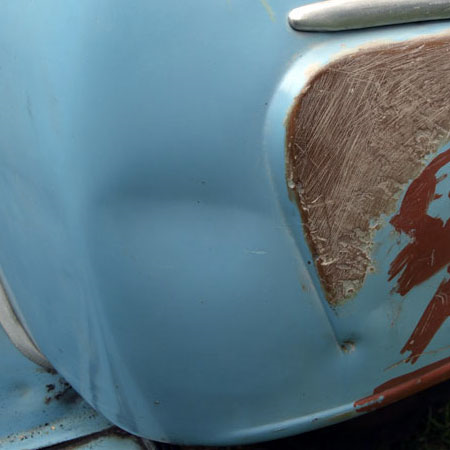 Thursday 17 December 2009 Took the engine to Roberto today and thus met him for the first time. A big significant step in the completion of this project as it commits me to spending money. He was surprised that I had it in bits as he assumed that we would test it on his rig. I had already made the decision to replace the seals and to give it a check once the crankcase had been split. Roberto was a very nice bloke who works out of his garage. Clearly he loves Vespas and I told him I had seen the YouTube movies of his trip in Italy, and of a motor on his test rig. He pulled out various photos of the scooters he had owned and we had a great chat. I told Roberto about my conversation with Joseph and he agreed that he is a rather negative guy. He gave me a chrome rear seat base which he thought was 'rubbish'. I could tell from my search for various parts that this was a Vietnamese construction and I knew I could make use of it. How nice. Sunday 20 December 2009 I start to compile a list of hydro and sandblasters, panel beaters and spray painters around the Box Hill area. I send off 5 emails to various places: Metal strip Melbourne Soda Blasting Eco Soda Blasting Sandblast Multicoat Thursday 24 December 2009 More searching on the Internet as I continue to compile a list of hydro and sandblasters, panel beaters and spray painters. I have a feeling that Christmas is just around the corner. I guess I'll have to take a break for a few days.  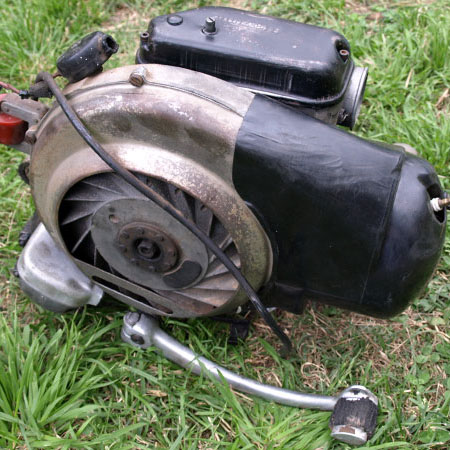 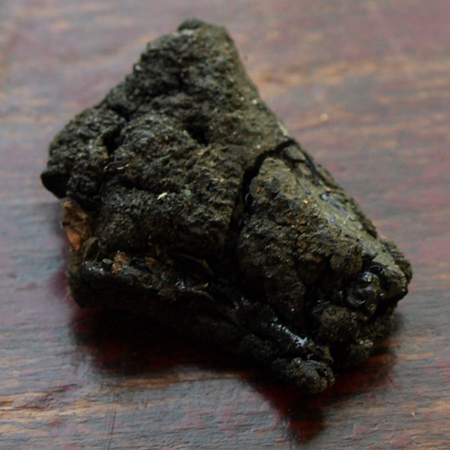   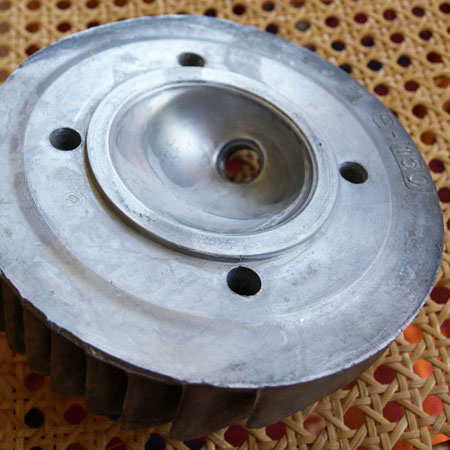 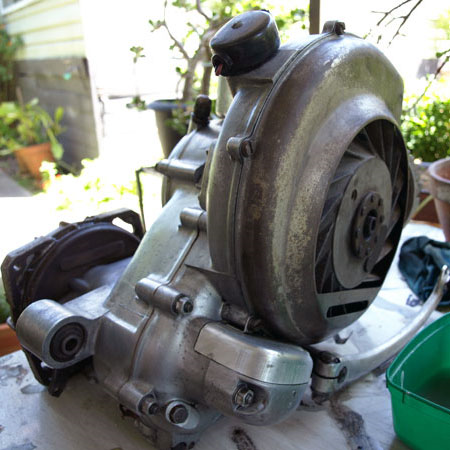 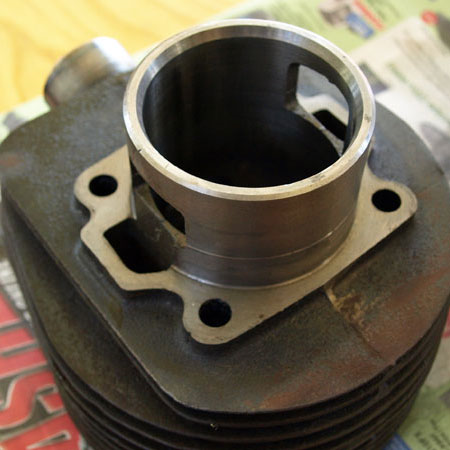 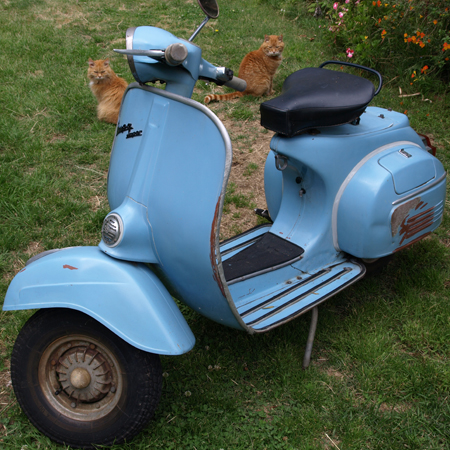   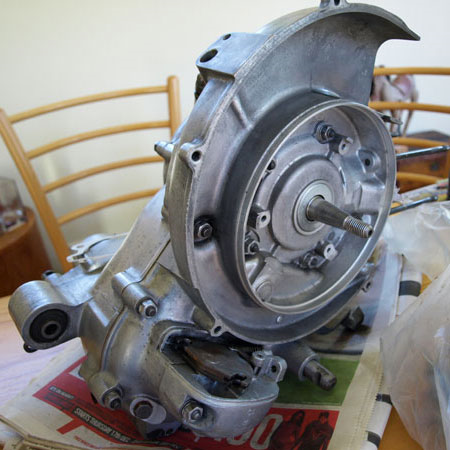  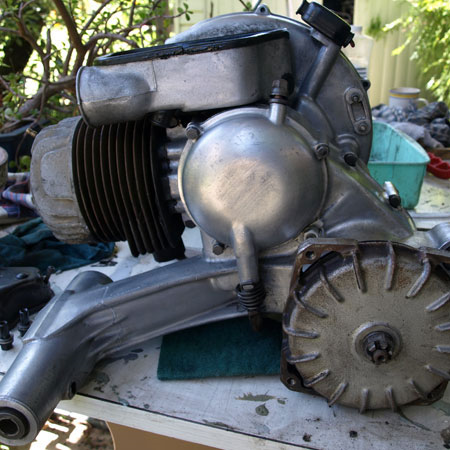 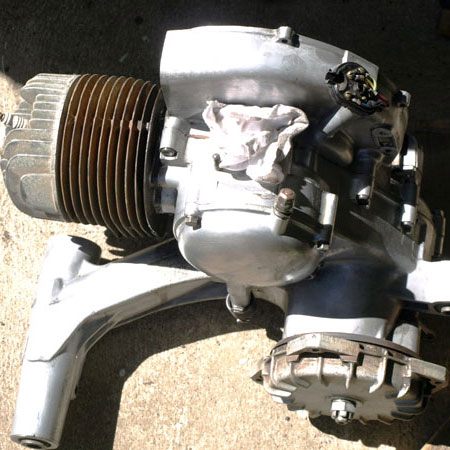 |
|
Post date: 2014-10-02 09:28:12 Post date GMT: 2014-10-02 09:28:12 Post modified date: 2014-10-02 09:34:07 Post modified date GMT: 2014-10-02 09:34:07 |
| Powered by [ Universal Post Manager ] plugin. HTML saving format developed by gVectors Team www.gVectors.com |


