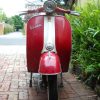
Follow along with me as I do my first Vespa restoration — on a 1961 VBB 150cc vintage Vespa
Originally Posted on http://vbbrestore.blogspot.com.au
Monday, July 7, 2008
Free at Last, Free at Last, my Shifter Tube is Free at Last
Here’s what finally worked. I removed the handgrip, then clamped the headset in my vice (protecting it with wood blocks over the metal vice faces), with the shifter tube pointing up. Then I doused it in PB Blaster (which I had been doing for the last month or so), and started heating up the headset with a blowtorch in the section where the shifter tube was. Including inside the headset. And I mean really heated it up — smoke was coming out the top of the tube! I squirted more PB Blaster in there (fun when it catches on fire). Then I put a 2×6 into the headlight opening of the headset (for leverage), and used a pipe wrench on the shifter tube. (Yeah, I was worried about scratching it up, but then figured it’s worthless if I can’t get the tube out, no matter how pretty it looks!) So using the 2×6 to keep it from turning in the vice, I cranked on the pipe wrench. And finally, slowly, it moved! Yay!
So I worked it back and forth like that with the pipe wrench till it was moving a little more freely, then forced a screwdriver gently under the flange that holds the clutch lever to pry it up, and was able to get it to start extracting. Once I got it out about 1/2 inch, then I was able to grab the tube by hand (using a rag to keep from burning my hand — it was still hot) and pull it all the way out.
It was pretty rusted at the outermost part of the tube that was still inside the headset, which I guess makes sense. But mostly surface rust — I was able to sand it off with emery paper and now it moves smoothly in the headset. The inside of the headset is fine, no corrosion there (gotta love aluminum or whatever it’s made of).
So now I am ready to believe that completing this project is actually possible! Hopefully this week we’ll be able to rebuild the front fork, then start on the fuel system (pulling and cleaning the gas tank, etc.). More later. Thanks for reading!


