| Replacing a broken gear cable on a geared Vespa in five easy steps.
How do you know you have a broken gear cable?
Start with the scooter turned off, resting on the kickstand. Move the scooter off the stand and pull in the clutch. Gently rotate the gear selector forward and back, slowing moving the scooter. If the left hand grip turns freely in both directions you have a broken a gear cable as a general rule. If your scooter will only roll with the clutch pulled in it’s a sure sign you have a cable problem.
Once you have identified the broken cable then replace it as follows;
Step 1: Open The Headset
Most gear cable breaks happen where stress is the greatest, under the headset. On a “P” series first remove the headset by removing the four bolts on the underside of the headset. On older single-piece headset Vespas you’ll have to remove the headlight unit and speedo to get at the gear cables. On most Lambrettas you’ll remove the headlight and headset top to get at the gear cables. When headset top is free, loosen the speedo cable where the cable meets the bottom of the speedo (you can make some slack at the top of the speedo cable by pushing the housing up into the forks,from bellow, near the front wheel). When the speedo is free turn the headset over being careful not to pull any of the electrical wire connections loose.
Step 2: Find the Broken Cable
The gear cables are under the headset on the left side connected to the gear selector arm. It’s easy to spot, just turn the handle a little, like you are shifting. At the end of this arm is a round disc with cables connected at the top and bottom. You’ll notice the metal inner cable and the plastic-coated outer cable. Most likely one of the inner cable ends has broken off. Examine both cables closely, looking for breaks.
Step 3: Remove the Selector Box Cover
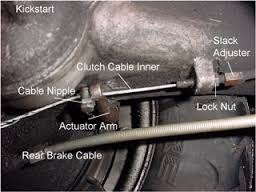
Just behind the kickstart lever is a oblong box protruding from the motor. This is the gear selector box (Lambrettas the gear selector is on the top of the motor). Remove the cover revealing the bottom ends of the gear cables (there is no cover on Lambrettas). You’ll be able to spot the cables as they run out of the gear selector box, by the kickstart lever into the body of the scooter. Examine the cables looking for breaks here as well.
Step 4: Remove the Old Cable
Once you have found the broken cable, remove it from the housing by pulling either at the top or the bottom, whatever is easier. It’s best to pull from the end where the break happens as you don’t want to pull the frayed ends through the housing.
Step 5: Install a New Cable
Feed you new inner cable down the housing following exactly the path of the old cable, from the top down. Older Vespas have a metal cap that you have to thread through before the cable goes into the housing. P series and models use a plastic guide that the inner housing is secured through under the headset. Pull the cable inner out of the outer cable routing it through the same path as the old cable.
Reconnect the cables as you found it and make sure they are adjusted correctly with the small adjuster screws at each cable end. |


